To lay slate chippings in a garden, clear the ground of any debris, lay a weed barrier, spread a layer of sand, and then lay the slate chippings evenly over the top. Laying slate chippings is an excellent way to add a beautiful and low-maintenance surface to your garden.
Slate chippings are available in various sizes and colors, making it a versatile option for different kinds of landscaping projects, from borders to paths and driveways. However, preparing the ground before laying the slate is essential for better results. We’ll discuss how to lay slate chippings in your garden effectively.
We’ll cover everything from the materials you need to the step-by-step process of laying slate, so you can achieve a stunning and durable surface that will enhance the look of your garden.
Preparing The Ground
Preparing the ground is crucial when laying slate chippings in your garden. You need to choose the right area and prepare the ground by removing any weeds, leveling the surface, and adding a layer of landscaping fabric before applying the slate chippings.
Clearing The Area
Before you lay slate chippings in your garden, you need to prepare the ground to ensure a stable and long-lasting finish. The first step is to clear the area where you want to lay the slate chippings. Clear away any debris, including rocks, plant material, or other objects in the area. Level the ground using a rake to ensure it’s smooth and even.
Laying A Weed Membrane
Once the ground is cleared, the next step is to lay a weed membrane. A weed membrane is a barrier that prevents weeds from growing through the slate chippings. It also assists in stopping water from penetrating the soil beneath the surface. You can purchase a weed membrane from a garden center or home improvement store. Cut the membrane to size and lay it down over the cleared area.
Adding An Edging
After laying the weed membrane, add an edging to keep the slate chippings contained and prevent them from spreading beyond the designated area. Use edging made of metal, wood, or plastic. Install the edging securely by inserting it into the ground around the perimeter of the area. Ensure it’s level and straight as this will give your garden a polished look.
In conclusion, ensuring the ground is well prepared with cleared area, weed membrane, and edging will set the foundation for a successful laying of slate chippings in your garden. Consider using hexagonal cells on a slope or heavy-duty weed membrane underneath growing medium on beds and borders for added confidence that no weeds will germinate. With these steps in place, you can create a permanent, low maintenance, and attractive outdoor space.
Choosing The Right Chipping
Choosing the right chipping is crucial when laying slate chippings in your garden. Ground preparation, proper installation and even the type of slate chipping you choose can determine the final look and longevity of your garden’s slate features.
When it comes to creating a beautiful garden with slate chippings, choosing the right chipping can make all the difference. Here are some things to keep in mind when selecting your slate chipping:
Size And Shape
Slate chippings come in a variety of sizes and shapes, so it’s important to choose the right one for your project. If you’re creating a pathway or driveway, larger chippings are a good option, as they will be easier to walk or drive on. For borders or mulching, smaller chippings may be more suitable. Irregular shaped chippings can create a unique and natural look, while uniform size and shape can give a contemporary and polished look.
Color Selection
Slate chippings come in a range of colors, including blue, green, and purple. When choosing a color, keep in mind the overall look you’re trying to achieve. Blue toned chippings can give a cool, zen-like vibe, while green-toned chippings can create a natural feel. If you want to make a bold statement, go for red or purple-toned chippings.
When selecting slate chippings, it’s also important to consider their suitability for your particular project. Some chippings may be better suited for water features or as ground covering, while others may be more durable for driveways or high traffic areas. Take the time to research and choose the best option for your garden project, and enjoy the beauty and functionality of your finished project.
Laying The Slate Chippings
Learn how to lay slate chippings in your garden with these helpful tips and tutorials. From ground preparation to choosing the right chippings, and from laying a gravel path to installing heavy-duty weed membranes, these resources will guide you through the process of rejuvenating your garden with slate.
Creating A Base Layer
Before laying your slate chippings, it is important to create a good base layer. The surface upon which you will lay the chippings should be free from any debris or plant growth. You can consider cutting some areas of your garden where you want to lay the slate chippings to create a smooth and level base. If you are planning a garden path or patio, you can dig the garden soil around 30cm deep and ensure that the area is laid with a compacted sub-base. This will help prevent weeds from growing and also keep the chippings in place.
Spreading The Chippings
Once you have created the base layer, it’s now time to spread the slate chippings evenly over the area. It is recommended to use around two bags of slate chippings per square meter. Using a shovel or a rake, spread the chippings carefully to ensure that they are evenly distributed. If you have an uneven and bumpy area, it’s important to use a bit more chippings to level out.
Leveling And Smoothing
After laying the slate chippings, use a screeding board or a plank of wood to level and smooth out the surface. Ensure that the chippings are spread out and levelled to avoid any uneven surfaces which can make walking challenging. Check that the chippings are levelled properly before moving on to installing any garden furniture.
That’s it! You now have a beautiful garden path or patio laid with slate chippings. The durability, aesthetics, and ease of maintenance make slate chippings the perfect addition to your garden. They are available in several colours, from blue-grey to plum shades and can revamp your garden into a beautiful place.
:strip_icc()/flagstone-patio-garden-stream-91eb9706-dc5df4e7423747579a503ca168e000a7.jpg)
Credit: www.bhg.com
Maintaining Slate Chippings
To maintain slate chippings in your garden, ensure the ground is properly prepared by removing all weeds and debris before laying a heavy-duty weed membrane. Lay the slate chippings on top and use sheets of hexagonal cells if on a slope to prevent them washing down.
Maintaining Slate Chippings
Slate chippings are a great addition to any garden – they can be used for a variety of purposes, such as paths, driveways, mulching, borders, water features, and even as ground cover. Once laid, slate chippings are relatively low-maintenance, but some upkeep is required to ensure that they stay looking their best. In this section, we will look at some tips for maintaining your slate chippings, including raking and cleaning, and weed control.
Raking and Cleaning
Regularly raking your slate chippings will help to keep them looking neat and tidy. Leaves and other debris can easily accumulate on the surface of the chippings, and if left unattended, can lead to weed growth. Using a leaf blower or a stiff broom, gently sweep away any debris, taking care not to move the chippings around too much.
Cleaning your slate chippings can also help to maintain their appearance. We recommend using a pressure washer to clean them, as this is an effective way to get rid of any stubborn dirt or grime that may have built up. Be sure to use a low-pressure setting, as this will prevent the chippings from being dislodged from their position.
Weed Control
Although slate chippings are relatively weed-resistant, they are not completely immune to weed growth. To prevent weeds from taking hold, we recommend laying a heavy-duty weed membrane underneath the chippings. This will stop any seeds from germinating and will help to keep your chippings looking pristine. If you do spot any weeds poking through, be sure to pull them out by the root as soon as possible, to prevent them from spreading.
In conclusion, maintaining your slate chippings is relatively straightforward and requires only a little bit of effort. By regularly raking and cleaning your chippings, and using a weed membrane to prevent any weeds from growing, you can enjoy a beautiful and low-maintenance garden feature for many years to come.

Credit: stonecenters.com
Frequently Asked Questions For How To Lay Slate Chippings In Garden
How Do You Prepare Ground For Slate Chippings?
First, remove any existing weeds and grass from the area where you want to lay the slate chippings. Then, level the ground and compact it with a roller or plate compactor. Install a weed membrane to prevent weed growth. Finally, spread a layer of slate chippings evenly over the ground, ensuring they are at least 4-5cm deep to provide effective coverage.
Can You Put Slate On Top Of Soil?
Yes, you can put slate on top of soil. Slate chippings are well-suited to being placed directly onto soil as top dressing or slate mulch. When using slate as top dressing material on beds and borders, installing heavy-duty weed membrane underneath the growing medium will prevent weed germination. Keep in mind that if you are planning to put chippings on a slope, you should use sheets of hexagonal cells to prevent the stones from washing down to a pile.
How Do You Keep Slate Chippings In Place On A Slope?
To keep slate chippings in place on a slope, use hexagonal cells sheets to prevent the stones from washing away. Avoid using plastic as water will pool on the path or drive. Use heavy-duty weed membrane underneath the growing medium to prevent weeds from germinating.
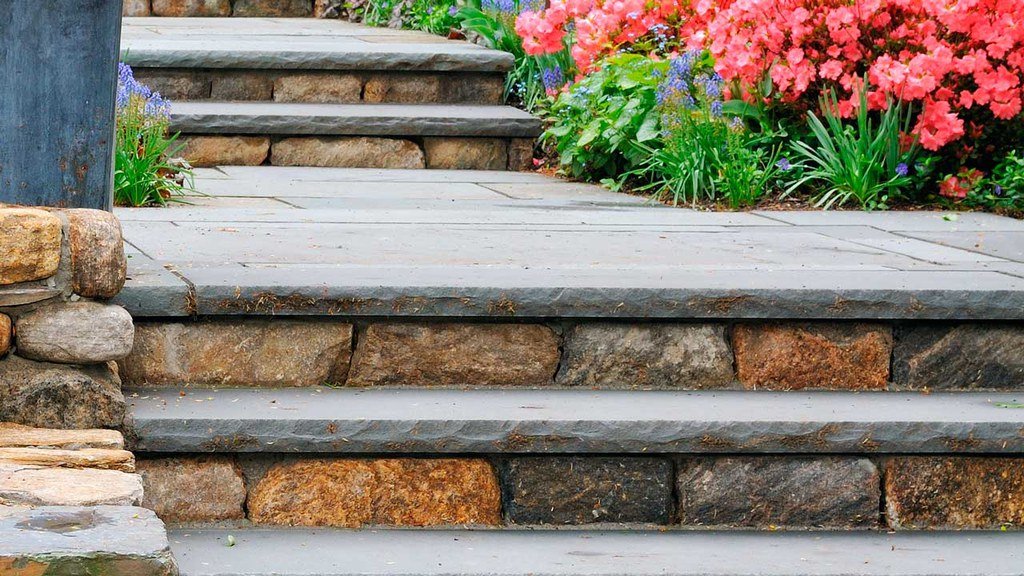
How Do You Lay Slate Steps?
To lay slate steps, you need to start by preparing the base with a layer of compacted hardcore and sand. Then, using mortar, lay the first row of slate slabs to create the base. After that, start laying the steps from the bottom up, cutting the slate pieces to fit the slope if necessary. Finally, secure the steps with mortar and add jointing compound between the slabs to finish the project.
How Do I Prepare The Ground For Slate Chippings?
To prepare the ground for slate chippings, you should remove all weeds, grass, and stones from the area, then level the ground and lay a weed membrane. After that, lay a layer of hardcore, then cover it with about 4-5cm of sand before adding your slate chippings.
Conclusion
To sum up, laying slate chippings in your garden is a great way to add an aesthetic touch while reducing maintenance requirements. It’s important to prepare the ground properly before laying the chippings and consider using a weed membrane to prevent weed growth. Additionally, using heavy-duty cells can help keep the chippings in place on a slope. By following these simple steps, you can enjoy a stunning garden space with durable and long-lasting slate chippings.